Saturday, February 02, 2008

Head warmer/Chauffe-tête

Scroll down for English


Patron: Oursin de Mer II

Laine: 1 écheveau de Lamb's Pride Bulky (3 mailles par 2,5 cm, 114 m par écheveau)

Temps requis: Deux ou trois soirées

Modifications: Voir plus bas

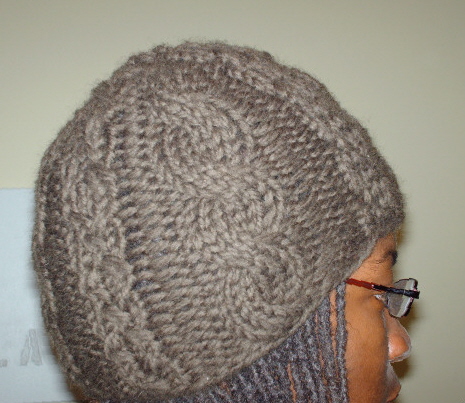
Un nouveau béret et une réussite si vous voulez mon avis. Je crois que ce sera la version définitive de ce béret. J'y ai fait quelques changements, pas juste à cause du fait que j'ai changé de fil mais juste pour voir et ça a marché. Je peux arrêter de faire de chercher, ce béret est le chapeau idéal pour mes cheveux, tressés ou libres. OK je ferai d'autres tuques car j'aime en faire. J'ai mis d'autres photos du béret sur flickr.

Vu que j'ai utilisé mon patron origina,l j'y ai trouvé des erreurs et imprécisions que je vais corriger dans le message original. Les modifications ci-bas vous permettront de faire cette dernière version.

Positif: Facile et rapide à faire et vu que je n'utilise qu'un seul écheveau, assez peu dispendieux. Aussi j'adore la couleur, il va assez bien avec tout mes foulards même si je ne suis pas du genre à prendre la peine de les coordonner

Négatif: il devient un peu hasardeux de tricoter avec l'aiguille circulaire lorsque les diminutions sont entamées mais je suis devenue habile à faire le magic loop (je ne connais pas de traduction pour cette technique)

L'horreur: J'ai toujours le chauffe-cheveux...

Voici les modifications que j'ai apporté au patron original:

  • J'ai utilisé le fil seul et non en double, de toute manière je n'en ai utilisé qu'un seul écheveau

  • J'ai utilisé une aiguille circulaire de 5,5 mm pour monter 64 mailles (et non 68)

  • Après avoir fait les augmentations, j'ai changé d'aiguille en prenant une de 6,5mm pour le reste du chapeau

  • Il y a 96 mailles après avoir fait la rangée de rajout de mailles

  • J'ai attendu que le béret soit long de 12,5 cm avant de commencer les diminutions

  • J'ai tout de suite commencer à la rangée 5b suivit de la rangée 2b suivit de la rangée 7b. Par la suite on alterne les rangées 2b et 7b jusqu'à ce qu'il reste 8 mailles. Il ne faut pas faire les rangées 1b et 3 b.


Pattern: Sea Urchin II

Yarn: 1 skein of Lamb's pride Bulky (3 sts per 2,5 cm/ 1 inch, 115 m / 125 yards per skein)

Time required: 2 or 3 evenings

Modifications: see below

A new beret and a success I can say so myself. I think this will be the definitive version. I've made a few changes (not least of which is the different yarn used) just to see if it would work and it did. I can now stop looking for the ideal hat for my hair, this one works fine with my hair, tamed or loose. I'll still make other hats because I like to make them. I've posted other pics of the beret on flickr.

Since I used my original pattern to make this beret, I have found a few errors that I will correct in the original posting. The modifications below will allow you to make this current version.

The good: Pretty easy, pretty fast and at one skein, pretty cheap. I also love the colour, it goes with all my scarves even though I don't bother matching anything.

The bad: I have to say that once you start making those decreases with the circ it get tricky but I can say that I'm the magic loop queen!

The ugly: I still have the bun warmer...

Here are the modifications I've made for this hat:

  • I used a single yarn this time as opposed to using it double stranded like last time

  • I used a 5,5 cm/US 9 to cast on 64 sts (instead of 68 like in the original pattern)

  • After the increases, I switched to a 6,5mm/US 10 ½ needle for the remainder of the hat

  • There are 96 sts after the increases

  • I waited until the hat was 12,5 cm/5 inches long before I started the decreases

  • For the decreases I started straight away at row 5b followed by row 2b followed by row 7b. You will continue alternating rows 2b and 7b until you have 8sts left. You do not do rows 1b and 3b.

Labels: , , ,

Tuesday, January 29, 2008

Ever get that feeling that you know for sure that you're going to lose something? Saturday I was certain that I was going to lose my Sea Urchin II when I put in in my coat pocket instead of my bag when I was riding on the metro and as predicted I did. Sooo I figured that would be a good time to brake out the two skeins of Lamb's Pride I picked up at Ariadne, the only difference being that I didn't have to double up the skein because it had a chunky gauge. Still, I accidentally used a 5.5mm circ instead of a 6.5, I cast on 4 less stitches (on purpose) and I started the decreases at 7.5 cm instead of 10 cm (again on purpose). Yes it's too small. I have yarn left over to try again but now I'm hesitating to between using the larger circs or using the original measurement before the decrease.

Avez-vous déjà eu l'impression que vous allez perdre quelque chose avant même que ça arrive? J'ai eu cet impression dans le métro samedi en mettant mon oursin de mer II dans ma poche au lieu de mon sac et évidemment c'est arrivé. C'était donc la bonne occasion d'utiliser la laine Lamb's Pride que j'ai acheté chez les filles d'Ariadne pour m'en faire un autre, sauf que je n'ai pas eu à utiliser le fil en double vu que c'est un gros fil. Je me suis trompée d'aiguille et j'en ai utilisée une de 5.5 mm au lieu du 6.5, j'ai décidé de montée 4 mailles de moins et j'ai commencé les réductions à 7.5 cm au lieu de 10 cm. Oui il est trop petit. Il me reste assez de fil pour m'en faire un autre, cependant j'hésite entre utiliser la bonne grandeur d'aiguille ou de le refaire à la taille que j'avais écris dans le patron.

Labels: , ,

Sunday, February 04, 2007

Urchin redux (with pattern)

EDIT 2 Feb 08: I've made yet another version, go here to check it out. You will have to combine the instructions below and the modifications in the new version to make it. I've also made a few corrections and clarifications in this pattern.

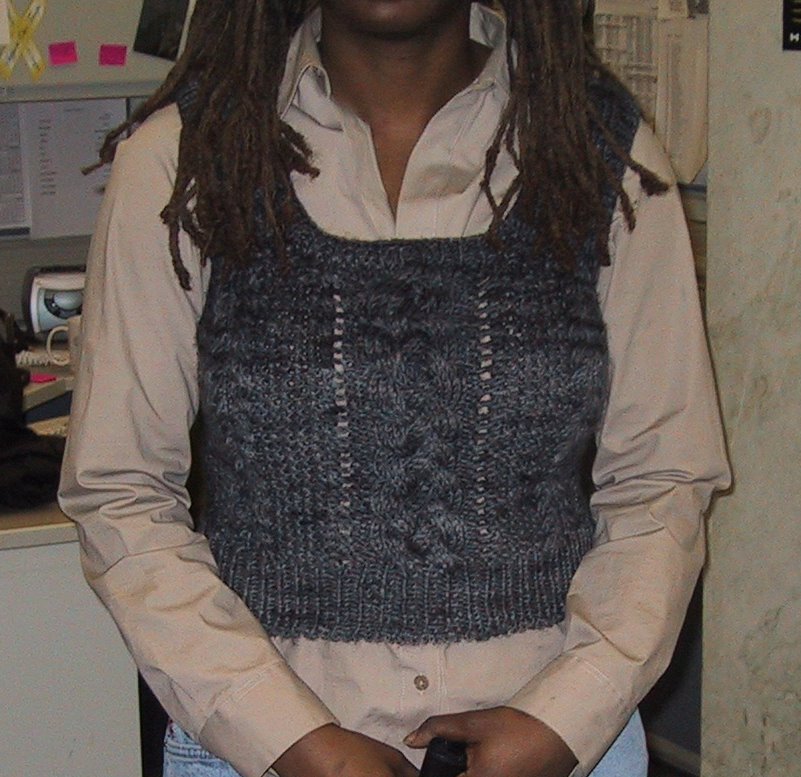
Last Wednesday after the knit meet, Angela and I were walking towards the metro and we were talking about the fact that when your hair completely disappears in a hat, it looks as if one has gone through chemo. I knew what she was talking about but that brutally illustrated with my new hair cut. I guess I'll have to keep in mind how I'll look before I pick a hat pattern. I finished redoing the Sea Urchin hat and when I first tried it on, I didn't like the no haired look. But I'm sure it would have looked great with my locs.


But then I decided to wear the hat the way I usually see berets worn. I liked it better but I don't like walking around with a bare forhead in sub-freezing temperatures.


Then I cocked it to one side, the way I usually wear my berets for work and I liked this version even better. But I don't think I'll be rocking this style too often for that very reason though. This version here is complely to one side but I can also bring a bit forward and it looks just as nice.


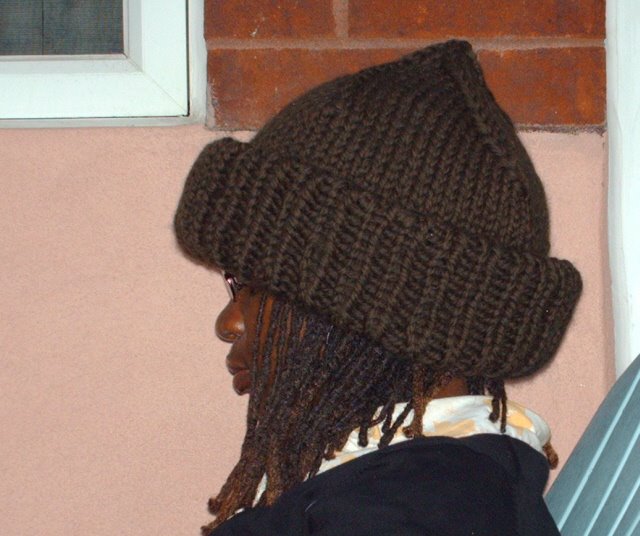
Finally I thought, why not bring the brim completely forward, paperboy style. I had to say I love this one the most. This is how I've been and will be wearing it.

Below, the pattern. I really reread it a million to make sure it's correct. Imagine my horror when someone who made the original urchin comment on the mistake on the decrease. But anyway I hope you enjoy. It's basically the original urchin pattern adapted to this version.

Material

2 hanks of yarn. I used O-Wool (a nice organic merino yarn) wich has a gauge of about 4,5 sts per inch, using 5.5 - 6.5 mm/US 8-10 needles . The yarn will be used double stranded (in other words, you need two skeins, balls, hanks, whatever...). Each hank has 181 meters of yarn

One 6,5 mm circ 100 cm/40 inches (worked like a charm last time so why change a good thing). It will be used magic looped. But I guess an 60 cm will do fine

One cable hook (but seriously, it would be best if you knew how to cable without one, it makes it less of hassle)

One tapestry needle

Eight st markers

Gauge

3,5 sts/2,5 cm - 1 inch in stockinette st, double stranded.


Abbreviations and symbols:

* *: Repeat the pattern in between the asterisks until the end of the round

M1P: Make one st purlwise

P2T: Purl two sts together

C2F: You do a left leaning twist using you cable needle. Without the cable, you place the right needle in the back, insert it in the second st on the left needle and k, then without slipping the sts off the left needle, you knit the first st. Now you slip the sts off the left needle.

C2R: You do a right leaning twist using your cable needle. Without the cable hook, you place the right needle at the front, insert it in the second st on the left needle and knit. Then without slipping the sts off the left needle, you knit the first st. Now you slip the sts off the left needle.

Icord: P the sts, slide the sts along the circ to the other end, then without turning the needle around, P again

Important:

a. This time, the hat is worked right side out.
b. The yarn is again used double stranded.
c. Do I have to specify that when you reach the st marker, you have to slip it from the left to right needle before you can move on?

Instruction

CO 68 sts using two strands of yarn, place a st maker and join without twisting.

Round 1 and 3: *K2, P2*
Round 2: *C2F, P2*
Round 4: *C2B, P2*

Edited: I lost this beret so I made another one with another rib that I like better:

Round 1 to 3: *P1, K1 through the back of the loop*

Increase row: *P2, M1P*. You now have 102 sts.


Round 1a: P until the end

Round 2a: *P1 in the st below, K1*. Note: unlike the last time where I simply k in the st below because that's what the st pattern book said, turns out it does make the ridges more distinct.

Repeat rows 1a and 2a until the hat measures 10 cm - 4 inches from the beginning, ending with round 2a.

Decrease:

When working the ribbed rows (the even numbered rows), keep in mind the sts you have in front of you. The 2nd st after the st maker will either be a P st or P in the st below. The last stitch before you slip the st marker will always be a P st.

Round 1b: *P2T, P 32, place st marker*
Round 2b and alternate rows: *P1, work just like the rib st above (round 2) until the st marker*
Round 3 b: *P2T, P until st marker*. Note: REMOVE THE ST MARKERS IN THIS ROUND EXCEPT THE ONE MARKING THE BEGINNING OF THE ROW. At this point you now have 96 sts
Round 5b: *P2T, P 10, place st marker*
Round 7b: *P2T, P until the st maker*

Repeat rounds 2b followed by 7b until you have 8 sts left, ending with round 2b. You may want to remove the st markers at this point (except for the one that marks the beginning of the round) because they're a hassle. At least they were for me. Note: If you don't want the Icord finish, then cut the yarn leaving an 8 inch tail, remove the st marker, weave the yarn it through the live sts, pull tight and then weave it in the hat . And you're done.

For the Icord:

Next 2 rounds: P2T until the end of the round. You now have 2 sts left. Remove the st marker. Using the Icord method above, make a 1 inch tail. Break the yarn leaving a 6 inch tail, pass the yarn through the live sts and pull tight. You can weave the leftover yarn into the tail and then break it off the leftover yarn.

Enjoy!


Labels: , ,