About the dryer/À propos du séchoir

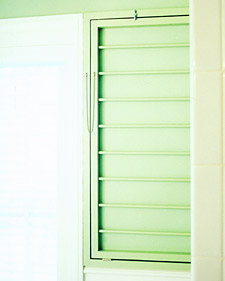
OK so I actually was sceptical of my ability to make this dryer but I'm sooo proud of myself. As I said in the beginning, I'd seen the project in a Martha Stewart Living mag but I couldn't find it in the ones I had so I figured out how to make it. I have to say that my biggest worry was doing all the wholes for the dowels, I even considered renting a drill press but it turned out fine with my regular drill. I wanted the dryer to be 2" larger but I'm happy that it ended up being narrower because it looks better on the wall though that means I lose the chance to dry about 4 extra pairs of sock... or two panties. I'm also impressed by the fact that I didn't really plan out the project before hand all I did a rough sketch at the reno store to see if I'd go for the 6' lumber instead of 8'. Otherwise, it was designed as I went along.
Once done I couldn't wait to do a load of laundry. It was never a problem before hand, unlike loading the dishwasher, but now I like knowing that I did it myself. Plus, as they say in those design shows on TV, I could take it with me if I move. Now I have to find a retail store supplier to get my hands on a ton of hangers, the type with the head that pivots, to hang my shirts to dry, not only for this dry but also for another project I have in mind.
Positive:
-It was an easy and quick project
-I also like the fact that I have enough knowledge to figure things out, like knowing before hand to make sure tha the inner frame would be able to pivot into the outer frame
-The ribbon worked quite well as a clamp for the frames. Much cheaper that buying clamps
-I thought that hanging it on the wall would be a two woman project but no, even with my convoluted way of doing it
Negative:
-I did make mistakes in measurements, some that sadly I figure out only after gluing the frames. I had to shorten one of the sides for the inner frame, leading to the horreur (yes I know that's not how it's spelled) you'll see below
-I really need to put my storage room in order because I had to look for some tools and now I have a ton of screws and wall anchors
-I need to learn to always to put my tools in the same spot during a project, would save me from looking all over every time
-Hanging the outer frame on my wall was not that difficult, but I went D'oh as I was writing the instructions when I realized I took a complicated way to do it
-Painting the dowels was a pain...
The horreur

I had to relocate the turn button


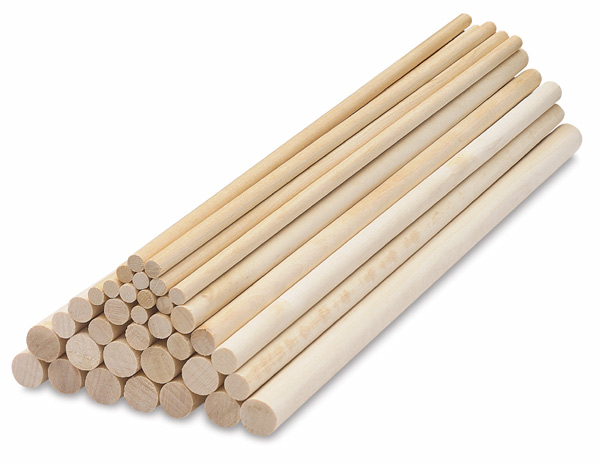
I wished that I had inspected all the dowels closely upon purchase

This is the result of having to shorten the side piece by about 1/16 of an inch. One day I'll get some wood filler to fix it

You can't really tell here but some of the lumber I picked were warped. I could have performed the simple check of putting them on floor, on all sides, to make sure they rested flatly on the ground but I didn't. That is why the top of the inner frame is sticking to the outer frame

Temps requis: une semaine bien que j'aurais pu le faire en trois soirée
Je l'avoue, j'étais quand même sceptique quant à mes capacités de faire ce séchoir mural mais j'en suis tèèèèèlllleement fière! Comme je l'avais dit au début de ce projet, je l'avais vu dans un Martha Stewart Living mais vu que je ne trouvais pas ma copie, j'ai du me débrouiller pour le faire. Ma plus grande inquiétude était de faire les trous pour les goujons, je voulais louer une perceuse à colonne mais finalement ça a bien été avec la perceuse ordinaire. J'aurais voulu que le séchoir soit 2" plus large mais je suis contente du résultat finale, même si ça veut dire que je perd de la place pour accrocher 4 paire de chaussette ou dans mon cas, 2 culottes... Je n'avais pas du tout fait de plan avant de commencer ce projet, c'est à peine si j'avais griffonné quelques lignes sur un bout de papier pour voir si ça valait la peine d'économiser 6$ en utilisant des planches de 6' au lieu de 8', pour le reste, j'ai tout planifié durant la fabrication.
Une fois terminé, j'avais hâte de faire une brassée de lessive. En fait, contrairement à la vaisselle (où plus précisément, la mettre dans le lave-vaisselle), la lessive n'ai jamais une corvée. Bonus, comme on dit souvent dans les émissions de réno-déco à la télé, je pourrai l'amener avec moi si je déménage. Maintenant il faut que je trouve un fournisseur de magasin de détails pour acheter des support à linge en plastique à tête pivotante, pour faire sécher mes chemises, pas juste pour ce séchoir mais pour un autre projet que j'ai en tête.
Positif:
-Ce fut un projet rapide et facile à faire
-J'aime aussi le fait que j'avais assez de connaissance pour faire ce projet à bien, comme le fait de m'assurer que le cadre intérieur puisse pivoter dans le cadre extérieur
-Utiliser le ruban comme serre-joint fut une brillante idée. Et pour peu de frais en plus
-J'ai cru qu'accrocher le cadre sur le mur aurait requis deux personnes mais finalement, non, malgré ma façon compliquée de le faire
Negatif:
-Oui, j'ai fait des erreurs de mesures. Quelques unes dont je me suis rendue compte une fois le tout collé en ensemble
-Il faut vraiment je mette de l'ordre dans ma remise outil, j'ai assez de vis et d'ancrage mural pour lancer ma propre quincaillerie
-Accrocher le cadre sur le mur ne fut pas difficile mais vraiment, je m'y suis vraiment mal prise
-Peindre les goujons: pas si amusant
-Faudrait que j'apprenne à toujours mettre mes outils à la même place, cela m'éviterait à toujours les chercher à chaque fois que j'en ai besoin
J'ai du déplacé le bouton poucier
J'aurais du prendre le temps de choisir mes goujons comme il faut
Ceci est ce qui est arrivé lorsque j'ai du raccourcir un des côté. Un jour je j'achèterai du bouche-trou pour arranger ça
Ça ne paraît trop mais quelques unes des planches que j'ai choisit n'était pas du tout droites. Tout ce que j'avais à faire pour vérifier ça aurait été de les mettre sur le sol, au centre de réno évidemment, sur tous les côtés, pour m'assurer qu'elles s'y reposent complètement à plat. Mais je ne l'ai pas fait.
Labels: FOs, Objet terminé, séchoir à linge mural, wall mounted cloth dryer
posted by Karine at 8:19 PM
3 comments/commentaires