
Wall cloth dryer (part 1)/Séchoir à linge mural (partie 1)
 De temps en temps, généralement lorsque mon niveau de sommeil atteint des niveaux acceptables, je me mets tout d'un coup à fourbir mon condo et à penser à de nouvelles façons d'améliorer de nouveau projet à faire. À ce chapitre, il y a longtemps de ça, j'avais vu ce séchoir à linge dans un Martha Stewart Living et j'ai toujours gardé en tête l'idée de le faire. Avec ma sécheuse qui ne fonctionne pas depuis mon retour de Québec au mois de mai dernier, je suis obligée de faire suspendre mes vêtements un peu partout chez moi, en plus d'abuser de mon séchoir à linge pliable. Je pensais que les instructions se trouvaient dans les magazines que j'ai encore à la maison mais non. J'ai donc du pensé comment faire et acheté les matériaux nécessaires en me rappelant de ce dont avait l'air le séchoir mural en plus de me servir de toutes mes années à monter des meubles.
Le weekend dernier j'ai décidé qu'il était grand temps que je le fasse et suis donc allée au centre de réno pour acheter le matériel nécessaire pour le faire. J'ai le mur idéal où accrocher ça dans ma toilette, j'espère ainsi éliminer le séchoir pliable qui encombre mon couloir de temps en temps.
Je partagerai comment faire ce projet que je bloguerai en cours de réalisation quoique j'en sois déjà rendu à l'étape de la peinture. Il est assez facile à faire mais je lui donnerais un cote difficulté de 3/5 à cause des outils qu'il faut savoir manipuler mai je crois que si on sait monter un meuble Ikea, on devrait pouvoir faire ceci.
Matériau requis:
4 planches de pin 1"x2"x6'
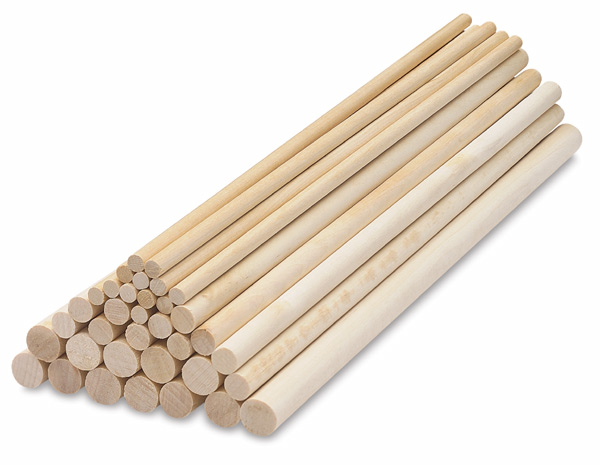
8 goujons de 3/8", 48" de long chacun
2 charnière étroite de 2"
2 morceau de chaîne de 24"
8 vis à bois de 2" (grosseur #8)
8 vis à bois d'un 5/8" dont la tête ressemble à ceci
1 boîte d'ensemble d'ancrage et vis qui contient au moins 4 ensembles
Colle de menusier
4 cornière pour meuble de 3/4"
1 bouton-poucier et vis
Peinture (au choix, je ferai le mien de la même couleur du mur sur lequel il sera suspendu)
1 morceau de papier collant à masquer
Outils requis
Perceuse et mèches de 3/8", 3/32"
Tournevis
Ruban de 1" de large qu'on se procure à la mercerie, pour le moins cher possible, 150" de long (à moins d'avoir des serre-joint de 48" dans son coffre à outil)
Niveau de 24"
Boîte et scie à onglet
Pinceau à peinture (je suggère d'avoir au moins un en mousse afin de pouvoir peindre les goujons quoiqu'un torchon propre pourra faire l'affaire aussi)
Ruban à mesurer
Facultatif:
Nappe en plastique jetable
Bouche-trou pour bois
Papier sablé

So, last weekend then I decided it was high time to make it so I went to the reno store to get the stuff. I have a perfect wall space for it in my bathroom so hopefully I won't have to suffer that portable dryer anymore.
I will be sharing the how-to that I will blog in as I go along although I already am at the painting stage. It's easy to make but I still give it a 3 out of 5 in difficulty because of the different tools you need to know how to use but then again, if you can put furniture together, this should be easy.
Materials required
4 1"x2"x6' pine lumber
8 3/8" dowel rods, 48" long
2 narrow hinges, 2"
2 pieces of chain, 24" each (made of small links because it will be screwed in place)
8 #8 wood screws, 2" long
8 wood screws 5/8"(with a head that looks like this)
4 plastic wall anchors and screw sets
Paint (colour of your choosing, I'm going to paint it the same colour of my bathroom walls)
1 piece of masking tape
Tools
Drill and bits (3/8", 3/32")
Screwdivers that match all those screws
1" wide ribbon (this you get at the fabric store, go for the cheapest in price , 150". If you happen to have a pair or two of 48"clamps in your tool box, you can use those
Paintbrush (I suggest you have sponge one or clean, lint free rag to pain the dowel rods)
Measuring tape
Optional
Plastic disposable tablecloth
Wood hole filler
Sand paper
Labels: DIY, part 1, partie 1, séchoir à linge mural, wall mounte cloth dryer
posted by Karine at 9:12 PM
![]()


1 Comments:
That's awesome! Way to go Martha Lady!
Post a Comment
<< Home